
Using The Purchase Order Screen
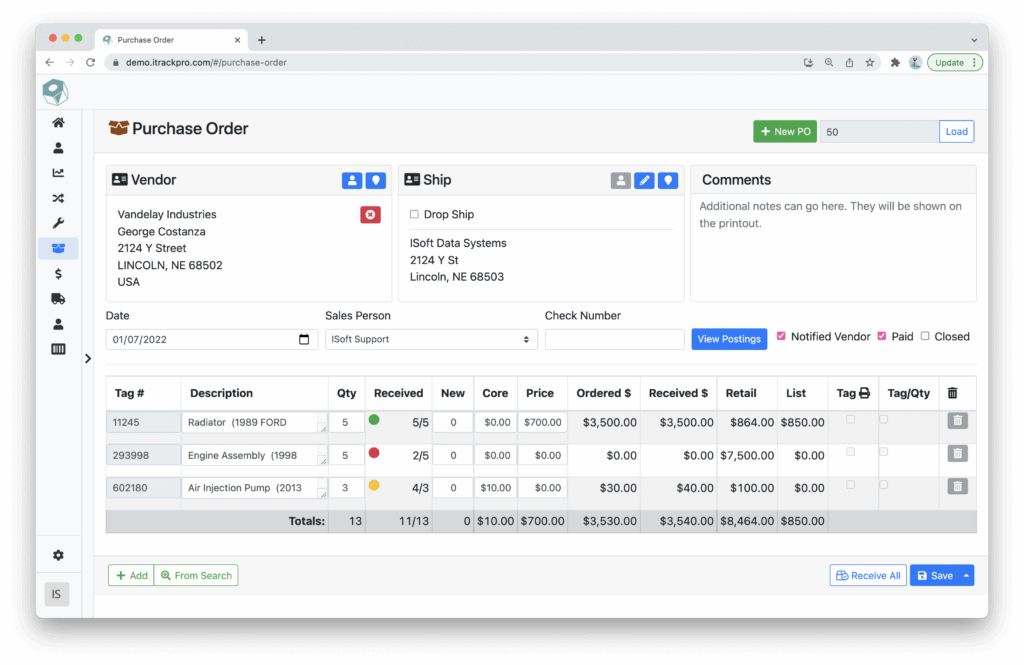
The Purchase Order screen is where you will go to create and manage Purchase Orders.

To create a new Purchase Order, click or tap on the green New PO button. For more information on creating a new Purchase Order, please review the Creating A New Purchase Order tutorial.
The Purchase Order number of the current Purchase Order you are viewing will be displayed next to the New PO button.
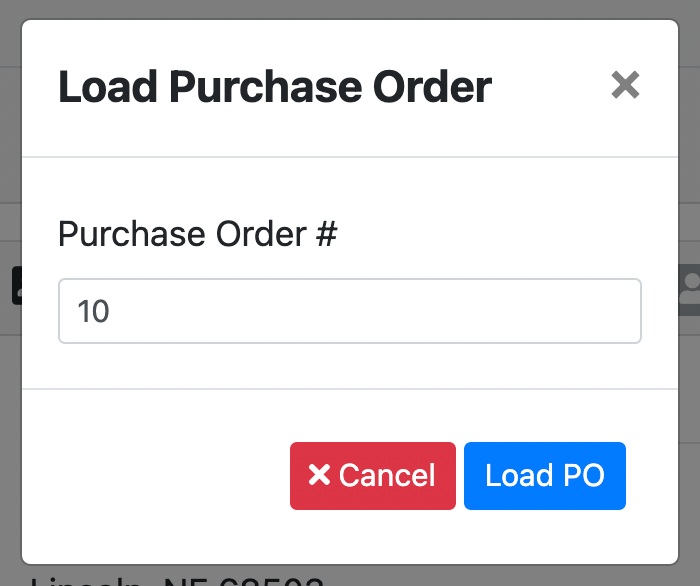
If you know the Purchase Order number, click or tap on the Load button. You will be able to type in the Purchase Order number and load it in the view.

You can change the date of the Purchase Order, the Sales Person, enter a Check Number, View previous postings, and mark if the vendor has been notified, and if the Purchase Order is Paid and/or Closed.
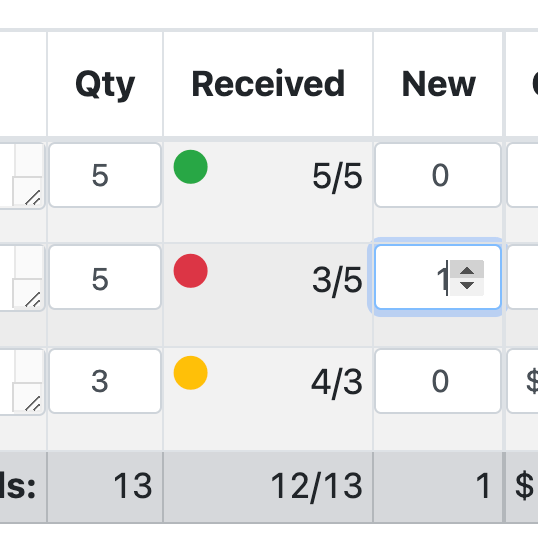
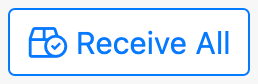
Once you receive the items from the Purchase Order, you will go in and edit the Purchase Order to reflect that. If you have received all of the items in the Purchase Order, you can simply click or tap on the Receive All button. It will automatically update the Purchase Order to show that you have received the full quantity of items. If you have only received a portion of the Purchase Order, you can manually update the quantity of items received by using the fields under the New column in the table.
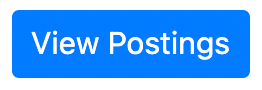
Every time the quantity of items received is updated, this will create a posting. Each posting will be recorded and saved, allowing you to view them. Click or tap on the View Postings button to see each posting for the Purchase Order.
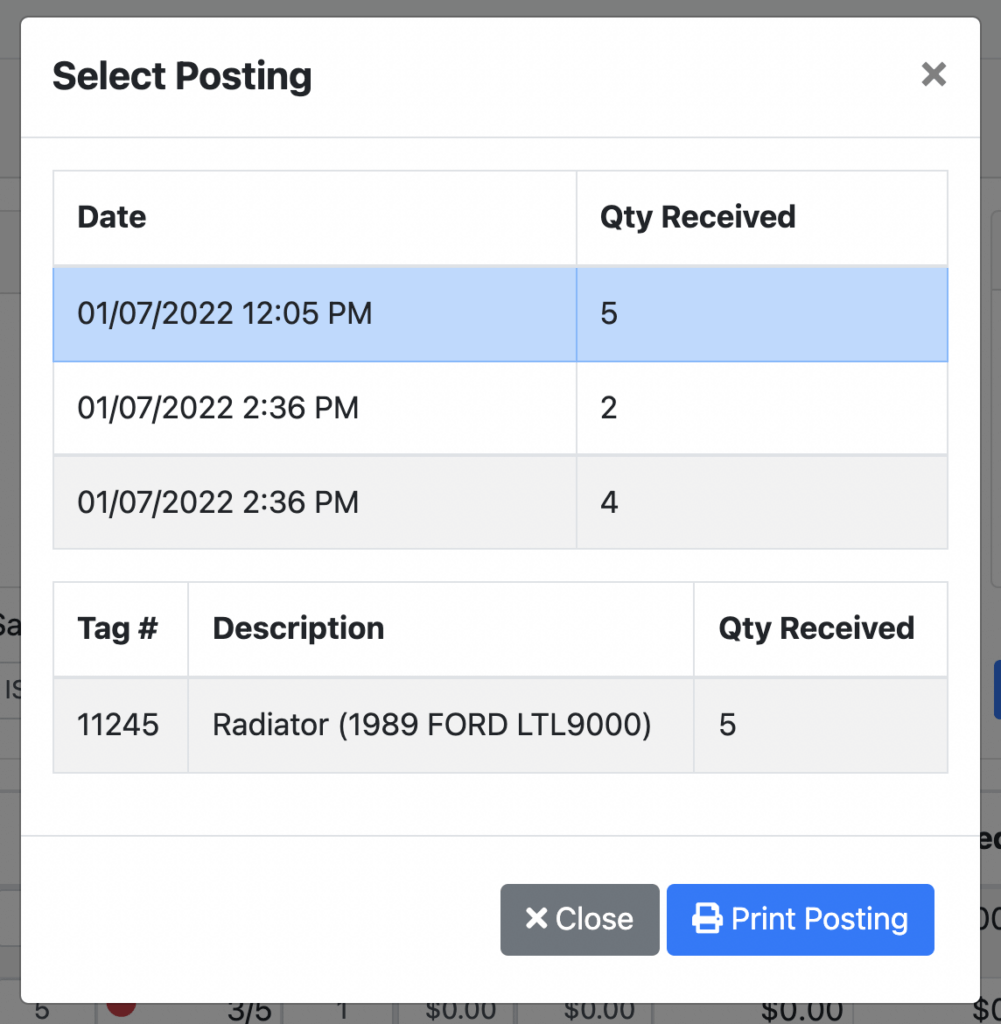
To view more information for a specific posting, click or tap on the posting in the Select Posting view. This will show each item that was received in that posting.
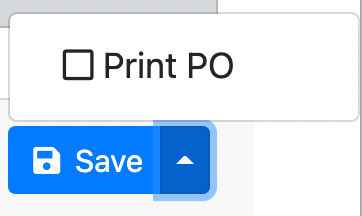
To save any edits to a Purchase Order, click or tap on the blue Save button. If you want to print the Purchase Order, click or tap on the “up arrow” icon next to Save and check the Print PO checkbox. This will bring up the print dialog when you save.
Vendor Section
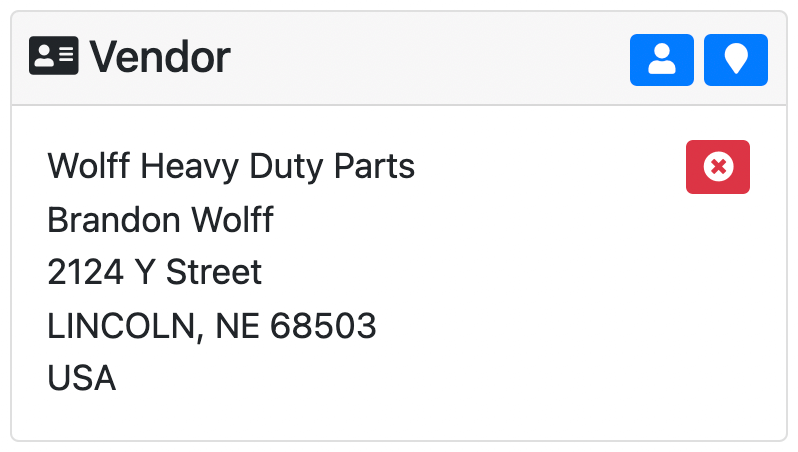
The Vendor section will display the vendor contact information.
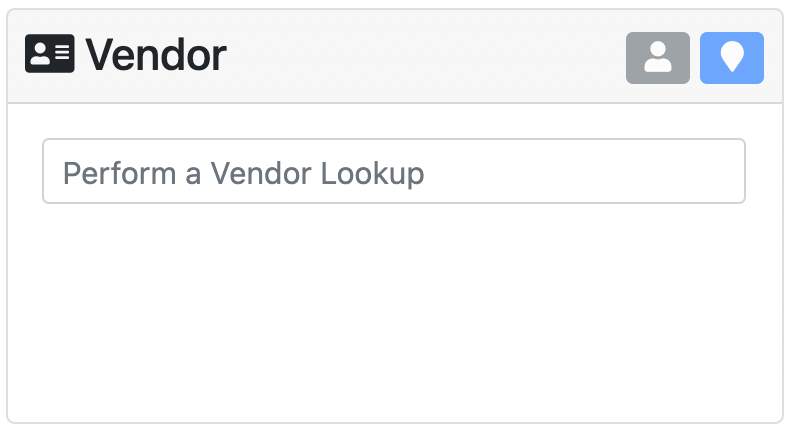
Search for the vendor by typing the Vendor Name in the search bar. If there is a matching vendor, it will automatically load that vendor. If there are more than one vendors matching what you searched, you will be able to choose between them.
To open the Vendor, click or tap on the blue “person” button. You will be able to make any edits to the vendor.
Click or tap on the blue “map pin” button to view the address on Google Maps.
To remove the current vendor and select a different one, click or tap on the red “x” button.
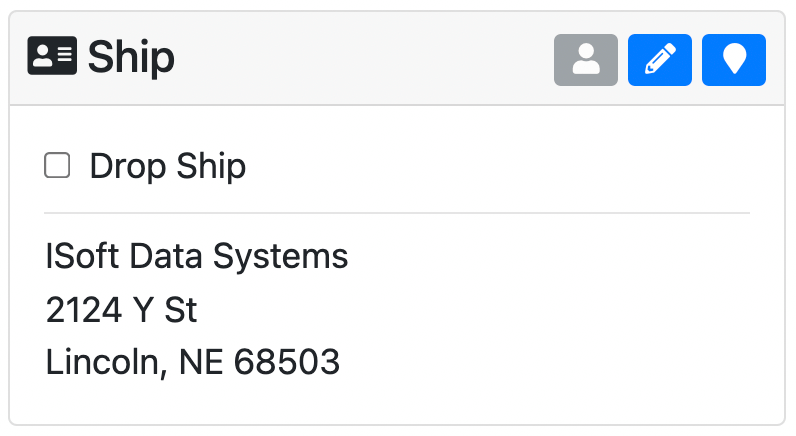
Ship Section
The Ship section will display the shipping information. By default, this will be set to your address.
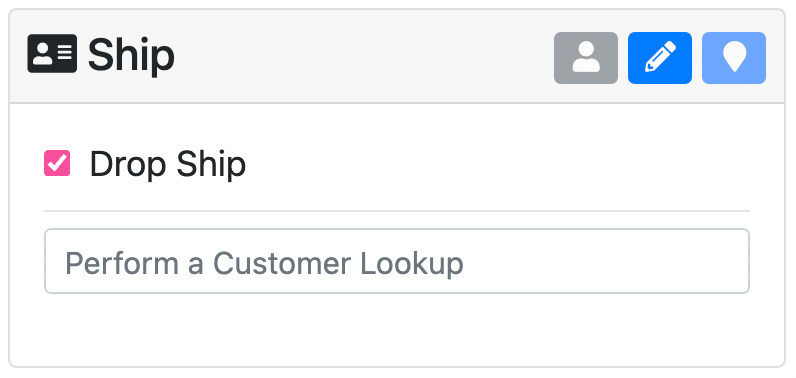
To select a different address, check the Drop Ship checkbox. This allows you to search and select a customer to ship the parts to.
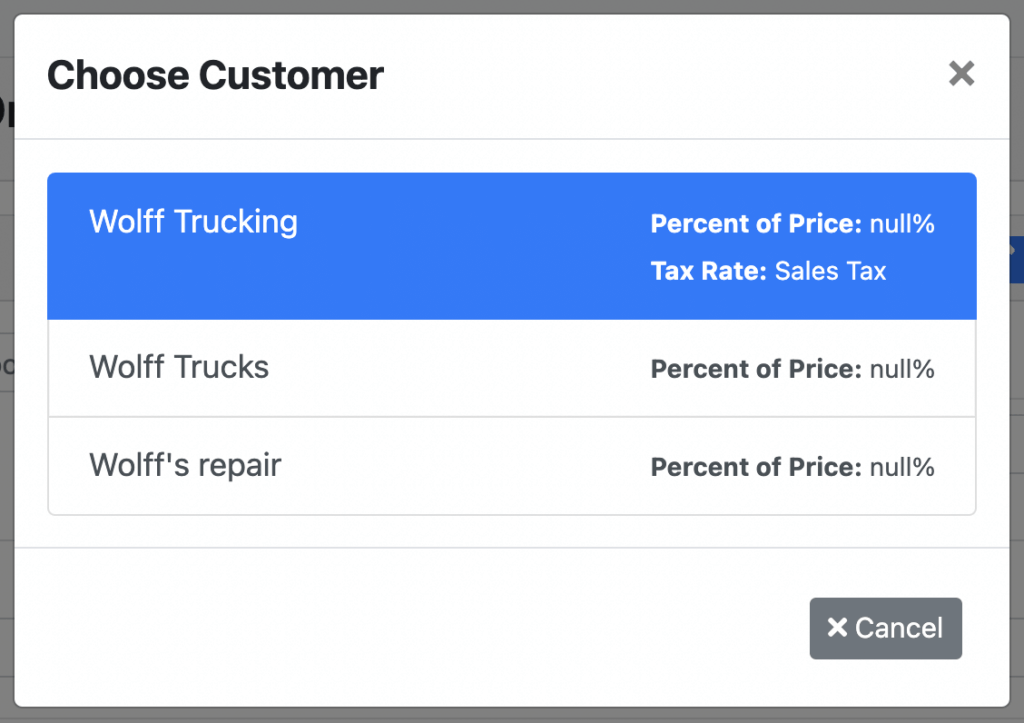
If you have a customer matching what you searched, they will automatically be loaded into the section. If there are more than one customer matching, you will be able to choose between them.
You can open the customer to view more information by clicking or tapping on the blue “person” button.
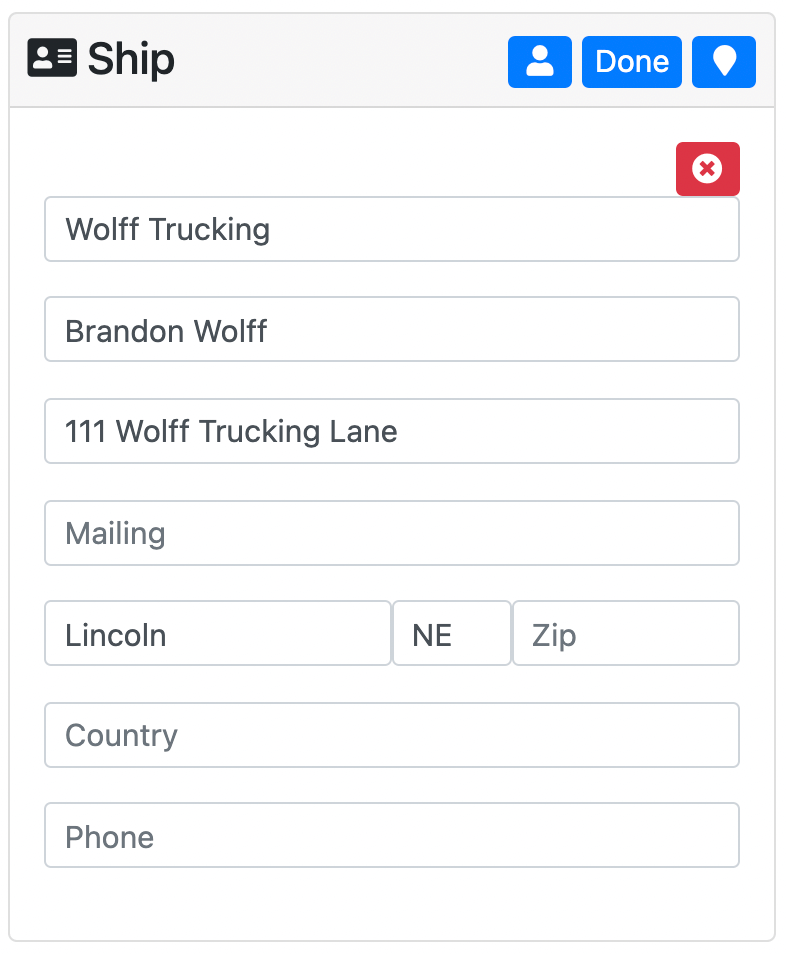
If you need to make any edits to the customer information on-the-fly, you can click or tap on the “pencil” icon.
To view the shipping address on Google Maps, click or tap on the blue “map pin” button.
If you have a customer selected for the shipping address and you want to remove it, click or tap on the red “x” button.
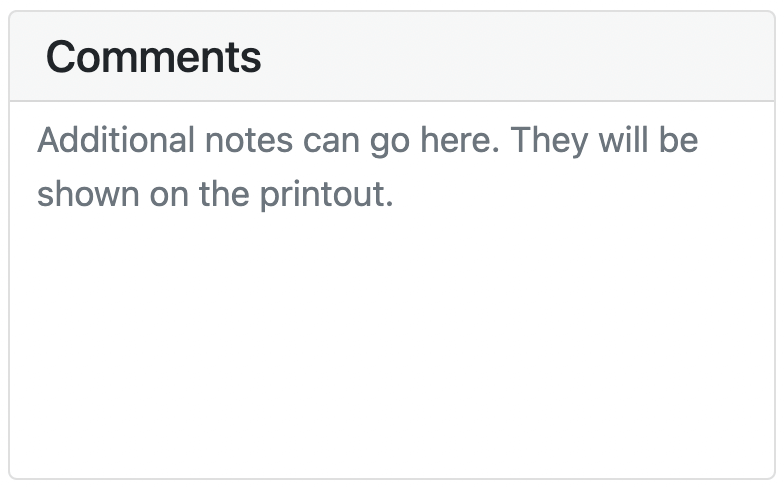
Comments Section
The Comments section is where you are able to type any comments regarding the Purchase Order. These comments will be shown on the printout.

Parts Table
The table displays all parts that are included in the Purchase Order along with the order information for each part – quantity, received, price, etc.
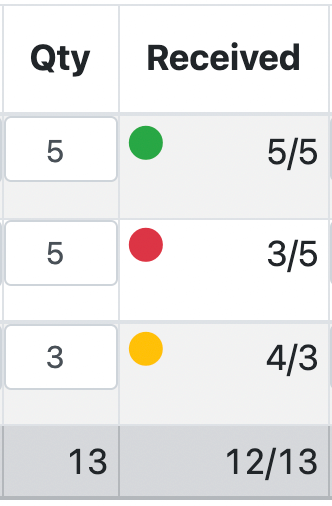
Under the Received column, you will notice colored dots. These dots are color-coded and represent the quantity received.
Color Coding
- Green – Received correct quantity
- Yellow – Received too many
- Red – Didn’t receive enough